When Rust compiles code, you get an executable if you created the application using the --bin command. In this blog, we shall look at how we can create a Dockerfile to create an image with this executable. We shall then deploy this image on EC2 using GitHub Actions which will be set on our repository https://github.com/workfall/workfall-rocket-rs which also has the source code for our web application.
In this blog, we will cover:
- Docker
- AWS EC2
- Hands-on
- Conclusion
Docker
We are going to containerize our application using Docker to make it easier to deploy on different target platforms. A container is created from an image and an image is simply a list of dependencies required to run a certain software on a target platform.
Docker is an open-source platform that automates the deployment and management of applications inside lightweight, portable containers. A container is a standalone unit that packages an application’s code, dependencies, and runtime environment, ensuring that the application runs consistently across different computing environments.
AWS EC2
We are going to use Elastic Cloud Compute service with Ubuntu OS to deploy our application. Amazon Elastic Compute Cloud (EC2) is a web service that provides resizable compute capacity in the cloud.
EC2 allows users to launch and manage virtual machines (called instances) on demand, providing a flexible and scalable environment for running applications and workloads. EC2 instances can be tailored to meet various performance, storage, and networking requirements.
Hands-on

AWS EC2
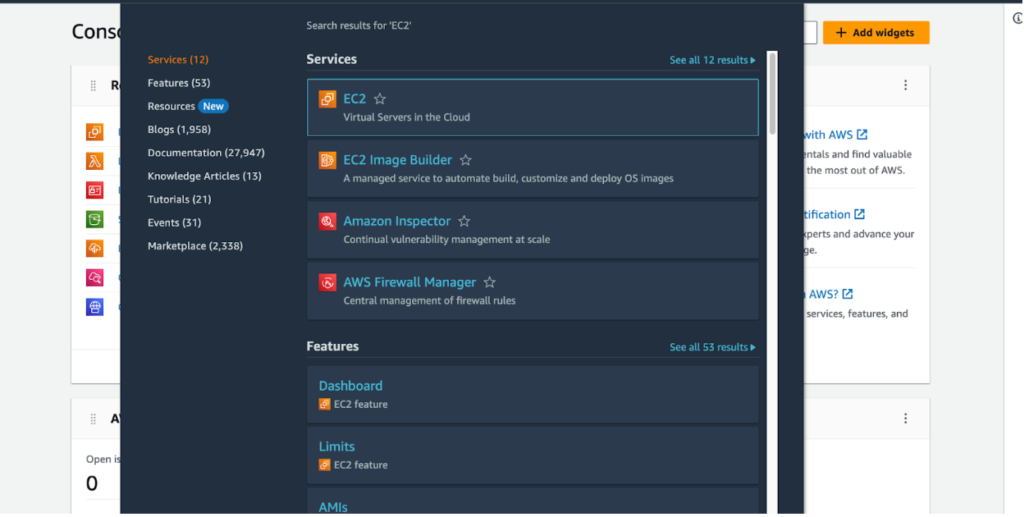
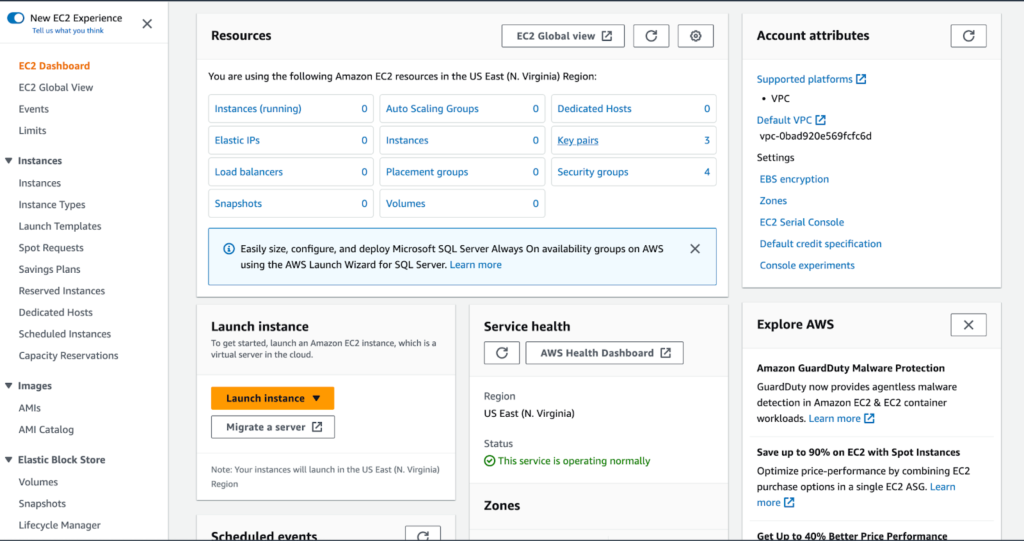
We will start by creating an EC2 instance. Click on the search bar and search for EC2.
Enter the application name.
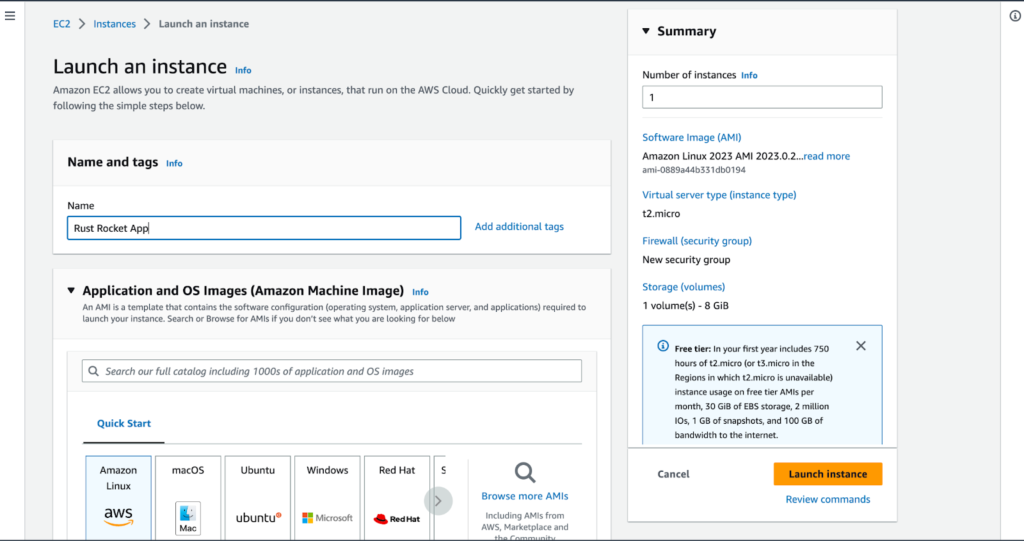
Choose Ubuntu OS AMI and also an instance type (advisable to select the free tier eligible).
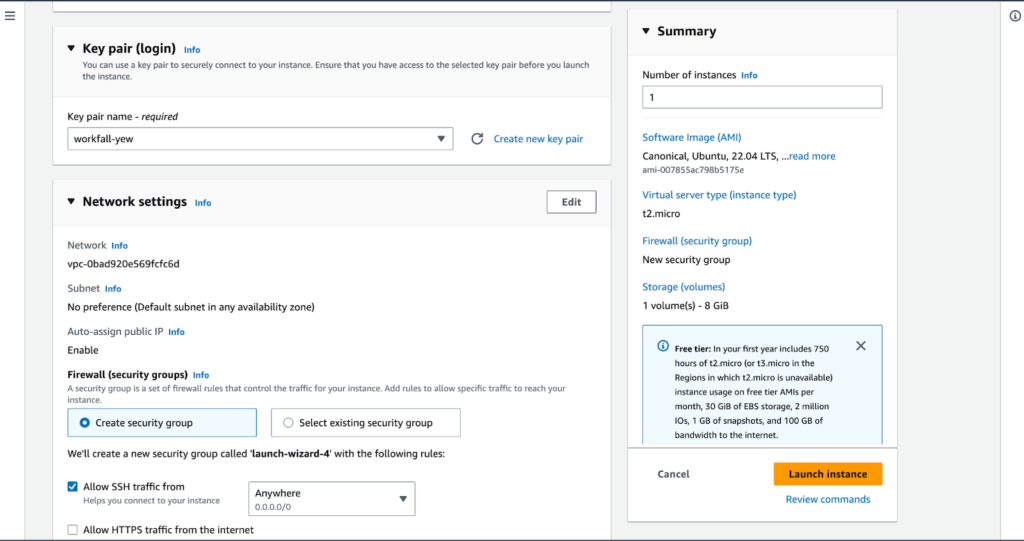
Select a login key pair from the existing one or create a new pair. This provides your instance with a public and private key which you can only view/download once. Remember to save it somewhere.

To login into your instance use the command ssh -i your-key-pair.pem ec2-user@your-instance-public-ip. You can do basic installations like docker. Also, ensure that you add your user to the docker group to avoid using sudo which may require password prompts. To achieve this, run the following commands:
sudo groupadd docker
sudo usermod -aG docker $USER
Code
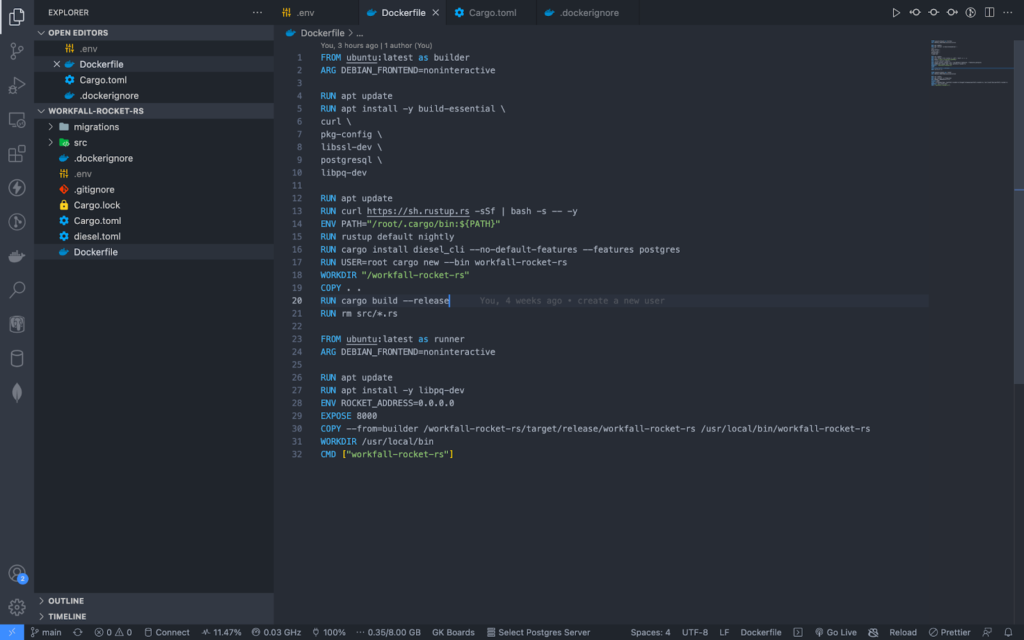
The Dockerfile will appear as follows:
We are going to package our application to run on Ubuntu OS using Ubuntu as the base image. In the future, we might look at deploying smaller binaries since Rust is cross-platform.
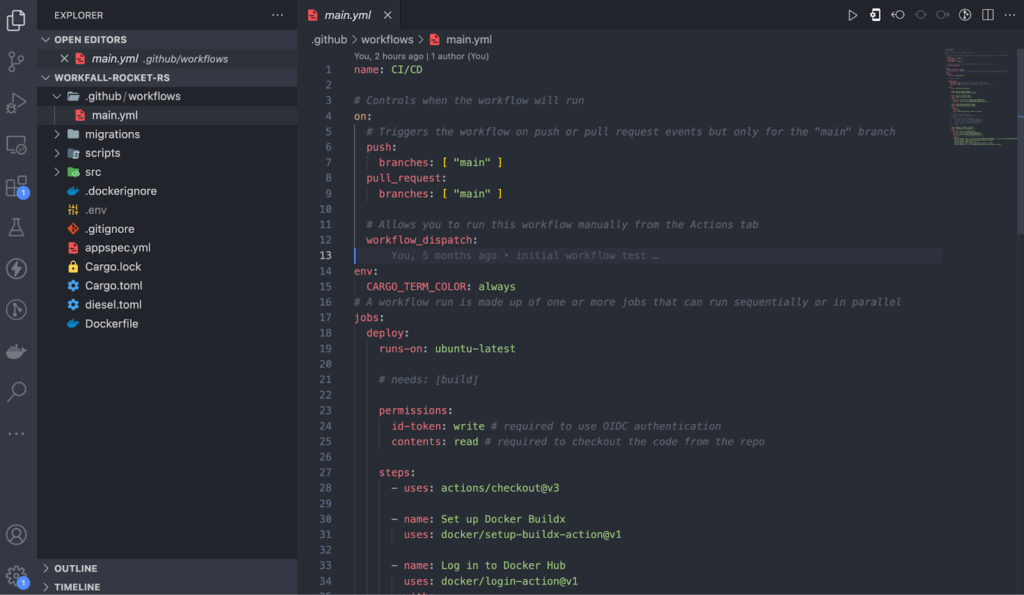
.github/workflows/main.yml(1):
In this GitHub Actions config file, we “tell” GitHub to trigger our workflow any time a push is done to the main or a pull request to the main is received.
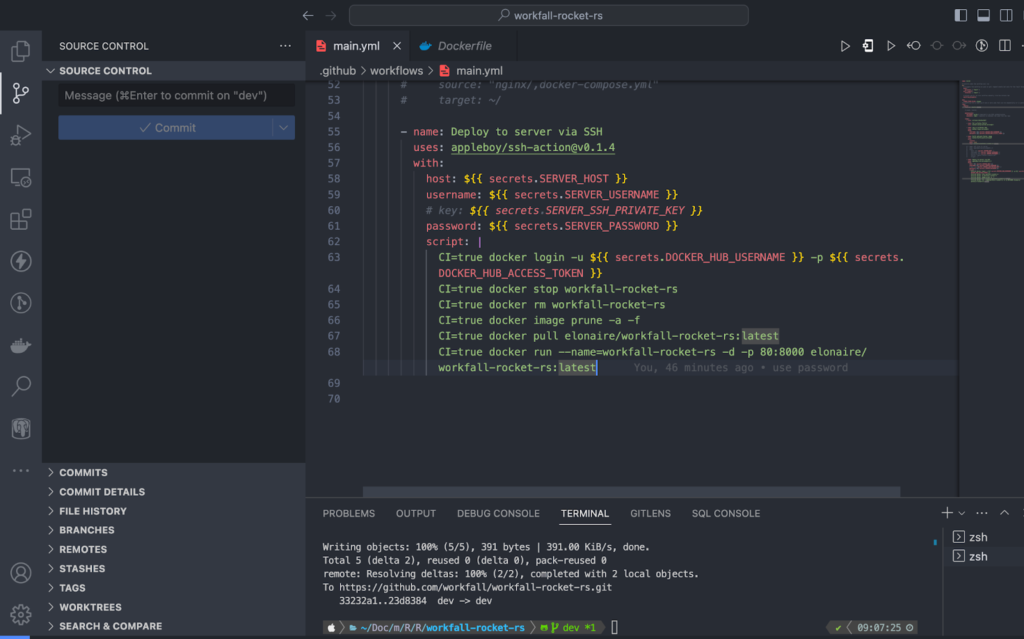
.github/workflows/main.yml(2):
In this section of the file, we deploy to our EC2 instance using SSH. To log in to our instance, we use either a password (not recommended) or using SSH private key(recommended). In this blog, we shall use passwords but in future blogs, we shall cover how to use securely connect using SSH private key.
In the script section, we run docker commands in the EC2 instance. First, we stop the running container by its name, next, remove the dangling container, remove/prune any dangling images, pull the latest image, and run a new container with the provided name.
In your GitHub repository, you are required to set all the required variables/secrets that will be used by
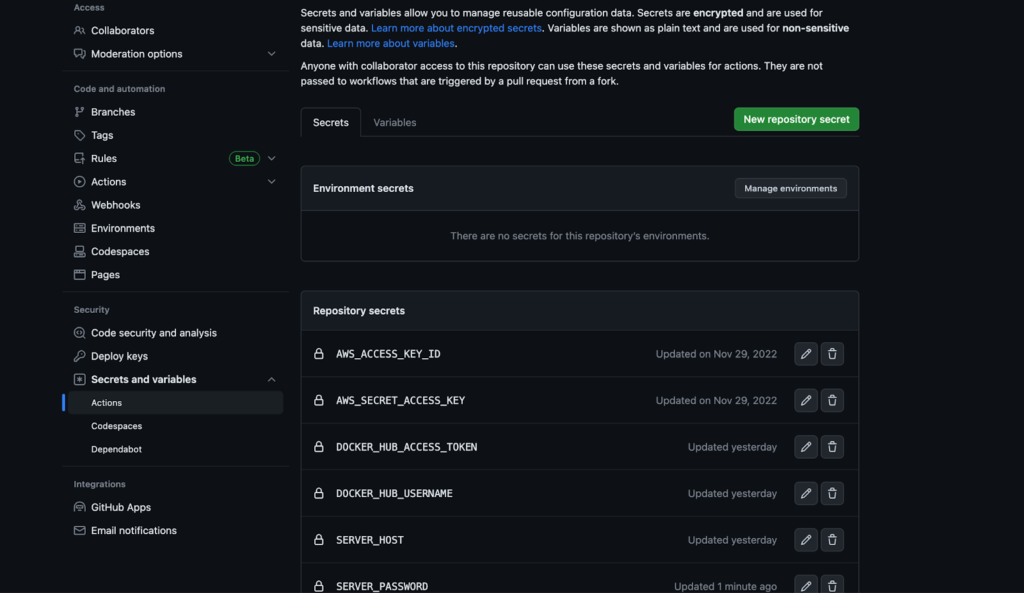
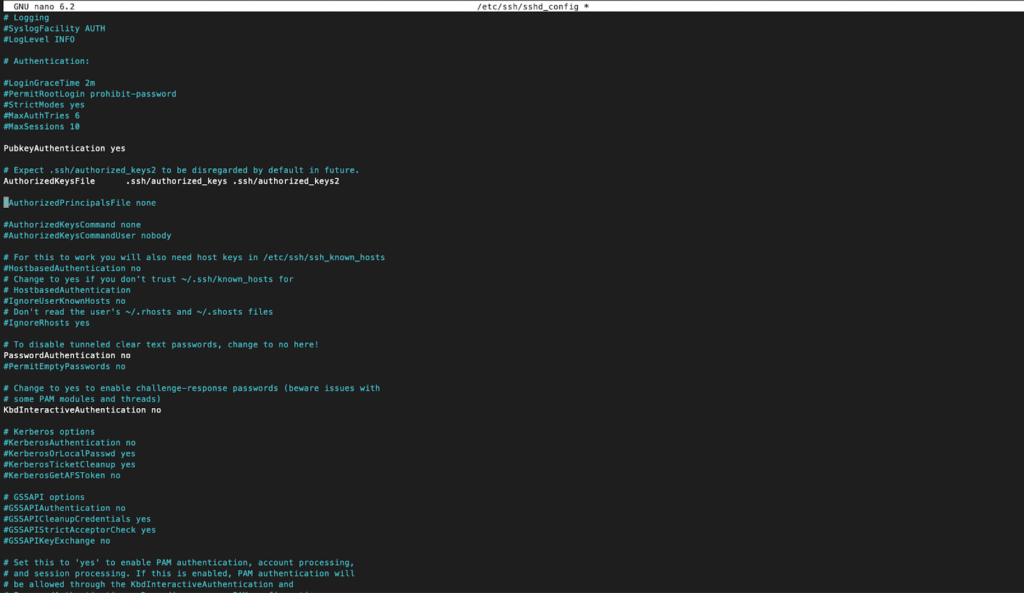
To enable SSH, we have to run the command ssh -i your-key-pair.pem ec2-user@your-instance-public-ip to login into your EC2 instance first, then type the following command sudo nano /etc/ssh/sshd_config. This command will open the config file below. You can enable the values as shown below.
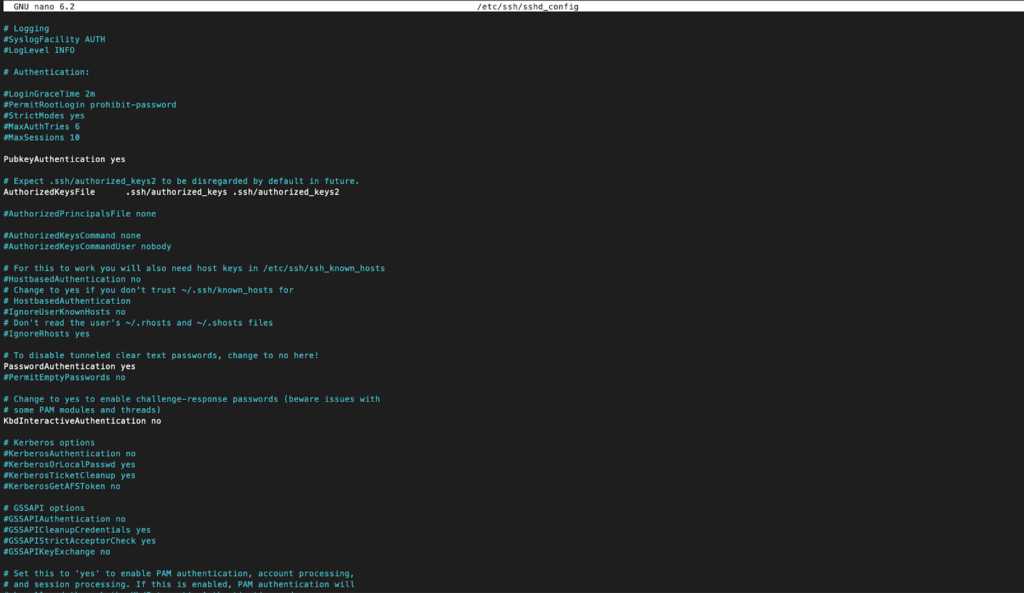
You can also enable password authentication as shown below:
Once you have these settings configured, you can push your code and submit a Pull Request which will automatically start your deployment pipeline.
All the steps should run successfully as shown below. In case the pipeline fails to run, please check that you have followed the above instructions to the latter or check if the yml file is valid syntax-wise.
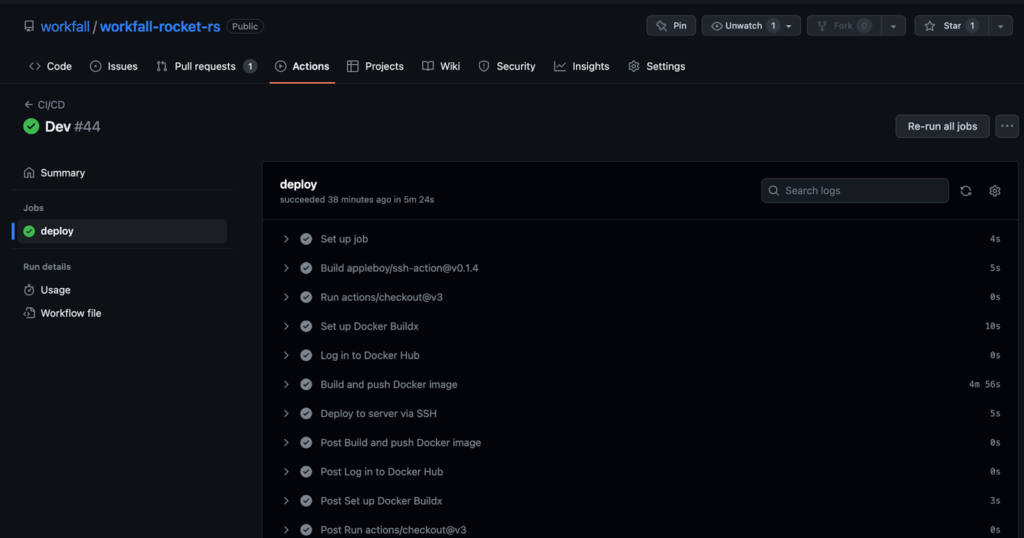
As a good practice, you may split these steps into smaller jobs so that in case of a failure, you won’t have to unnecessarily rerun all steps. After the deployment is complete, you can go back to the AWS EC2 console and access the public IP via your web browser.
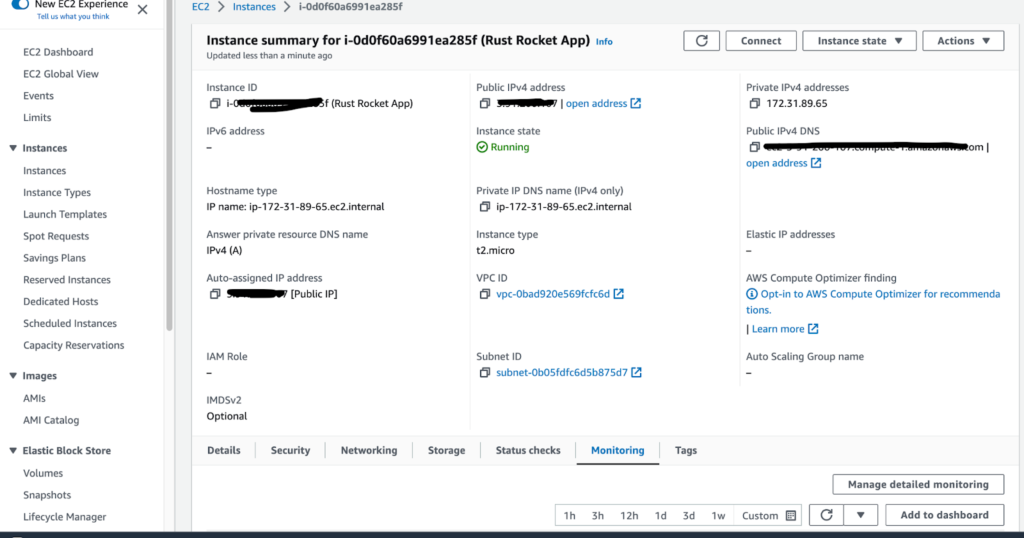
Click on the open address and remember to use HTTP instead of HTTPS unless you have configured an SSL certificate.
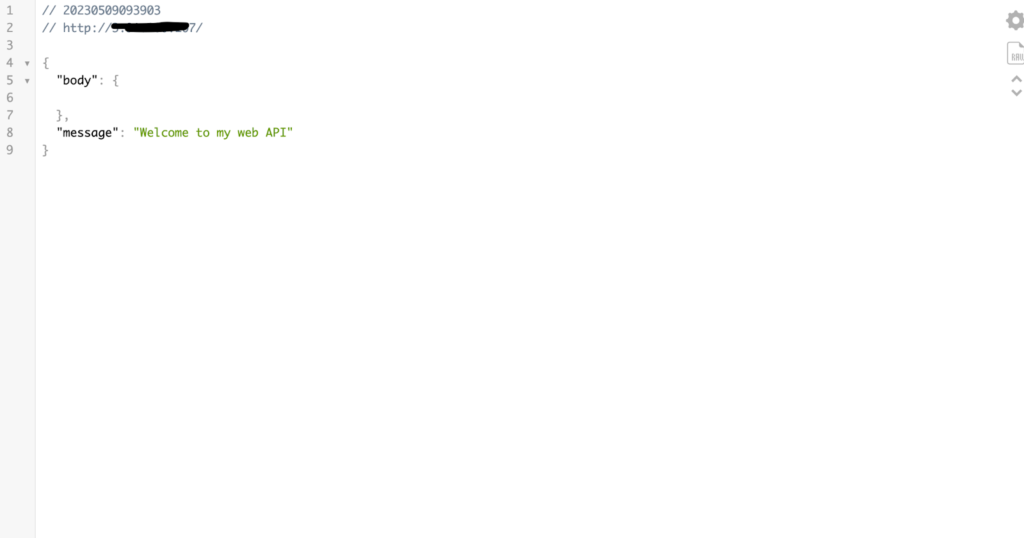
Conclusion
In this blog, we looked at how we can deploy a Rocket Rust REST API to an AWS EC2 instance using GitHub Actions and Docker. In this blog, we used password authentication but in the future, we shall look at SSH private key authentication and why it is the more secure option. We will come up with more such use cases in our upcoming blogs.
Meanwhile…
If you are a Rust & EC2 Lover and want to explore more about the above topics, here are a few of our blogs for your reference:
- How to Build a Rust WebAssembly Frontend App with Yew Framework?
- AWS is in love with RUST and you should be too!
- 15 AWSome years of Amazon EC2 and still going strong!
Stay tuned to get all the updates about our upcoming blogs on the cloud and the latest technologies.
Keep Exploring -> Keep Learning -> Keep Mastering
At Workfall, we strive to provide the best tech and pay opportunities to kickass coders around the world. If you’re looking to work with global clients, build cutting-edge products, and make big bucks doing so, give it a shot at workfall.com/partner today!


